5.1장 환경설정과 서버세팅
<환경설정>
1. Claude Desktop 설치
- 관련링크: https://claude.ai/download

2. 파이썬, NodeJS 설치
- 생략
3. UV (파이썬 패키지/프로젝트 관리도구) 설치
- uv? 파이썬 패키지 관리 및 프로젝트 관리를 위한 도구
- 관련링크: https://docs.astral.sh/uv/getting-started/installation/#installation-methods
Installation | uv
Use curl to download the script and execute it with sh: $ curl -LsSf https://astral.sh/uv/install.sh | sh If your system doesn't have curl, you can use wget: $ wget -qO- https://astral.sh/uv/install.sh | sh Request a specific version by including it in the
docs.astral.sh
1. 설치실행
curl -LsSf https://astral.sh/uv/install.sh | sh

2. 설치확인
uv --version

3. 가상환경 생성
uv venv

<서버세팅>
1. MCP 서버 관련 코드작성
from mcp.server.fastmcp import FastMCP

mcp = FastMCP("weather") # 1. MCP 서버 정의

SERVICE_KEY = os.environ.get("service_key", "")

@mcp.tool() # 2. 함수를 MCP 도구로 등록
async def get_current_weather(nx: str, ny: str) -> str: # 3. async def 비동기 함수로 정의
# ... 코드생략

if __name__ == "__main__":
  mcp.run(transport='stdio')
2. Cluase Desktop의 claude_desktop_config.json에서 정의해둔 MCP 서버 등록하기
1) Claude Desktop > Settings > Developer > Edit Config를 클릭하면 아래 사진과 같이 Claude 폴더가 열림

2) claude_desktop_config.json 파일을 처음 열면 아래와 같이 {} 외에는 아무런 내용이 없음

3) claude_desktop_config.json 파일에 아래의 코드를 작성하고 파일 저장!
claude_desktop_config.json 파일 내 코드
{
  "mcpServers": {
    "weather": {
      "command": "/Users/유저네임/.local/bin/uv",
      "args": [
        "--directory",
        "/Users/유저네임/Desktop/practice/weather",
        "run",
        "weather.py"
      ]
    }
  }
}

*유의사항: mac OS에서는 "command"에 uv의 폴더위치를 절대 경로로 적어야 함(uv라고만 적으면 못찾음)
=> 터미널창에 명령어 which uv를 입력하여 uv 설치경로 확인!
3. Claude Desktop을 재시작하면 서버가 등록된 것을 확인할 수 있음

4. 공공데이터포털 날씨정보 오픈API 활용신청
https://www.data.go.kr/data/15084084/openapi.do 에서 활용신청을 하면 아래와 같이 '일반 인증키(Decoding)'를 발급받음

5. Cluase Desktop의 claude_desktop_config.json에 인증키(Decoding) 작성
{
  "mcpServers": {
    "weather": {
      "command": "/Users/유저네임/.local/bin/uv",
      "args": [
        "--directory",
        "/Users/유저네임/Desktop/practice/weather",
        "run",
        "weather.py"
      ],
      "env": {
        "service_key": "일반 인증키(Decoding) 여기에 작성"
      }
    }
  }
}
6. Claude Desktop 껐다 다시 켜면 아래와 같이 service_key가 환경변수(Environment variables)로 등록된 것을 확인할 수 있음

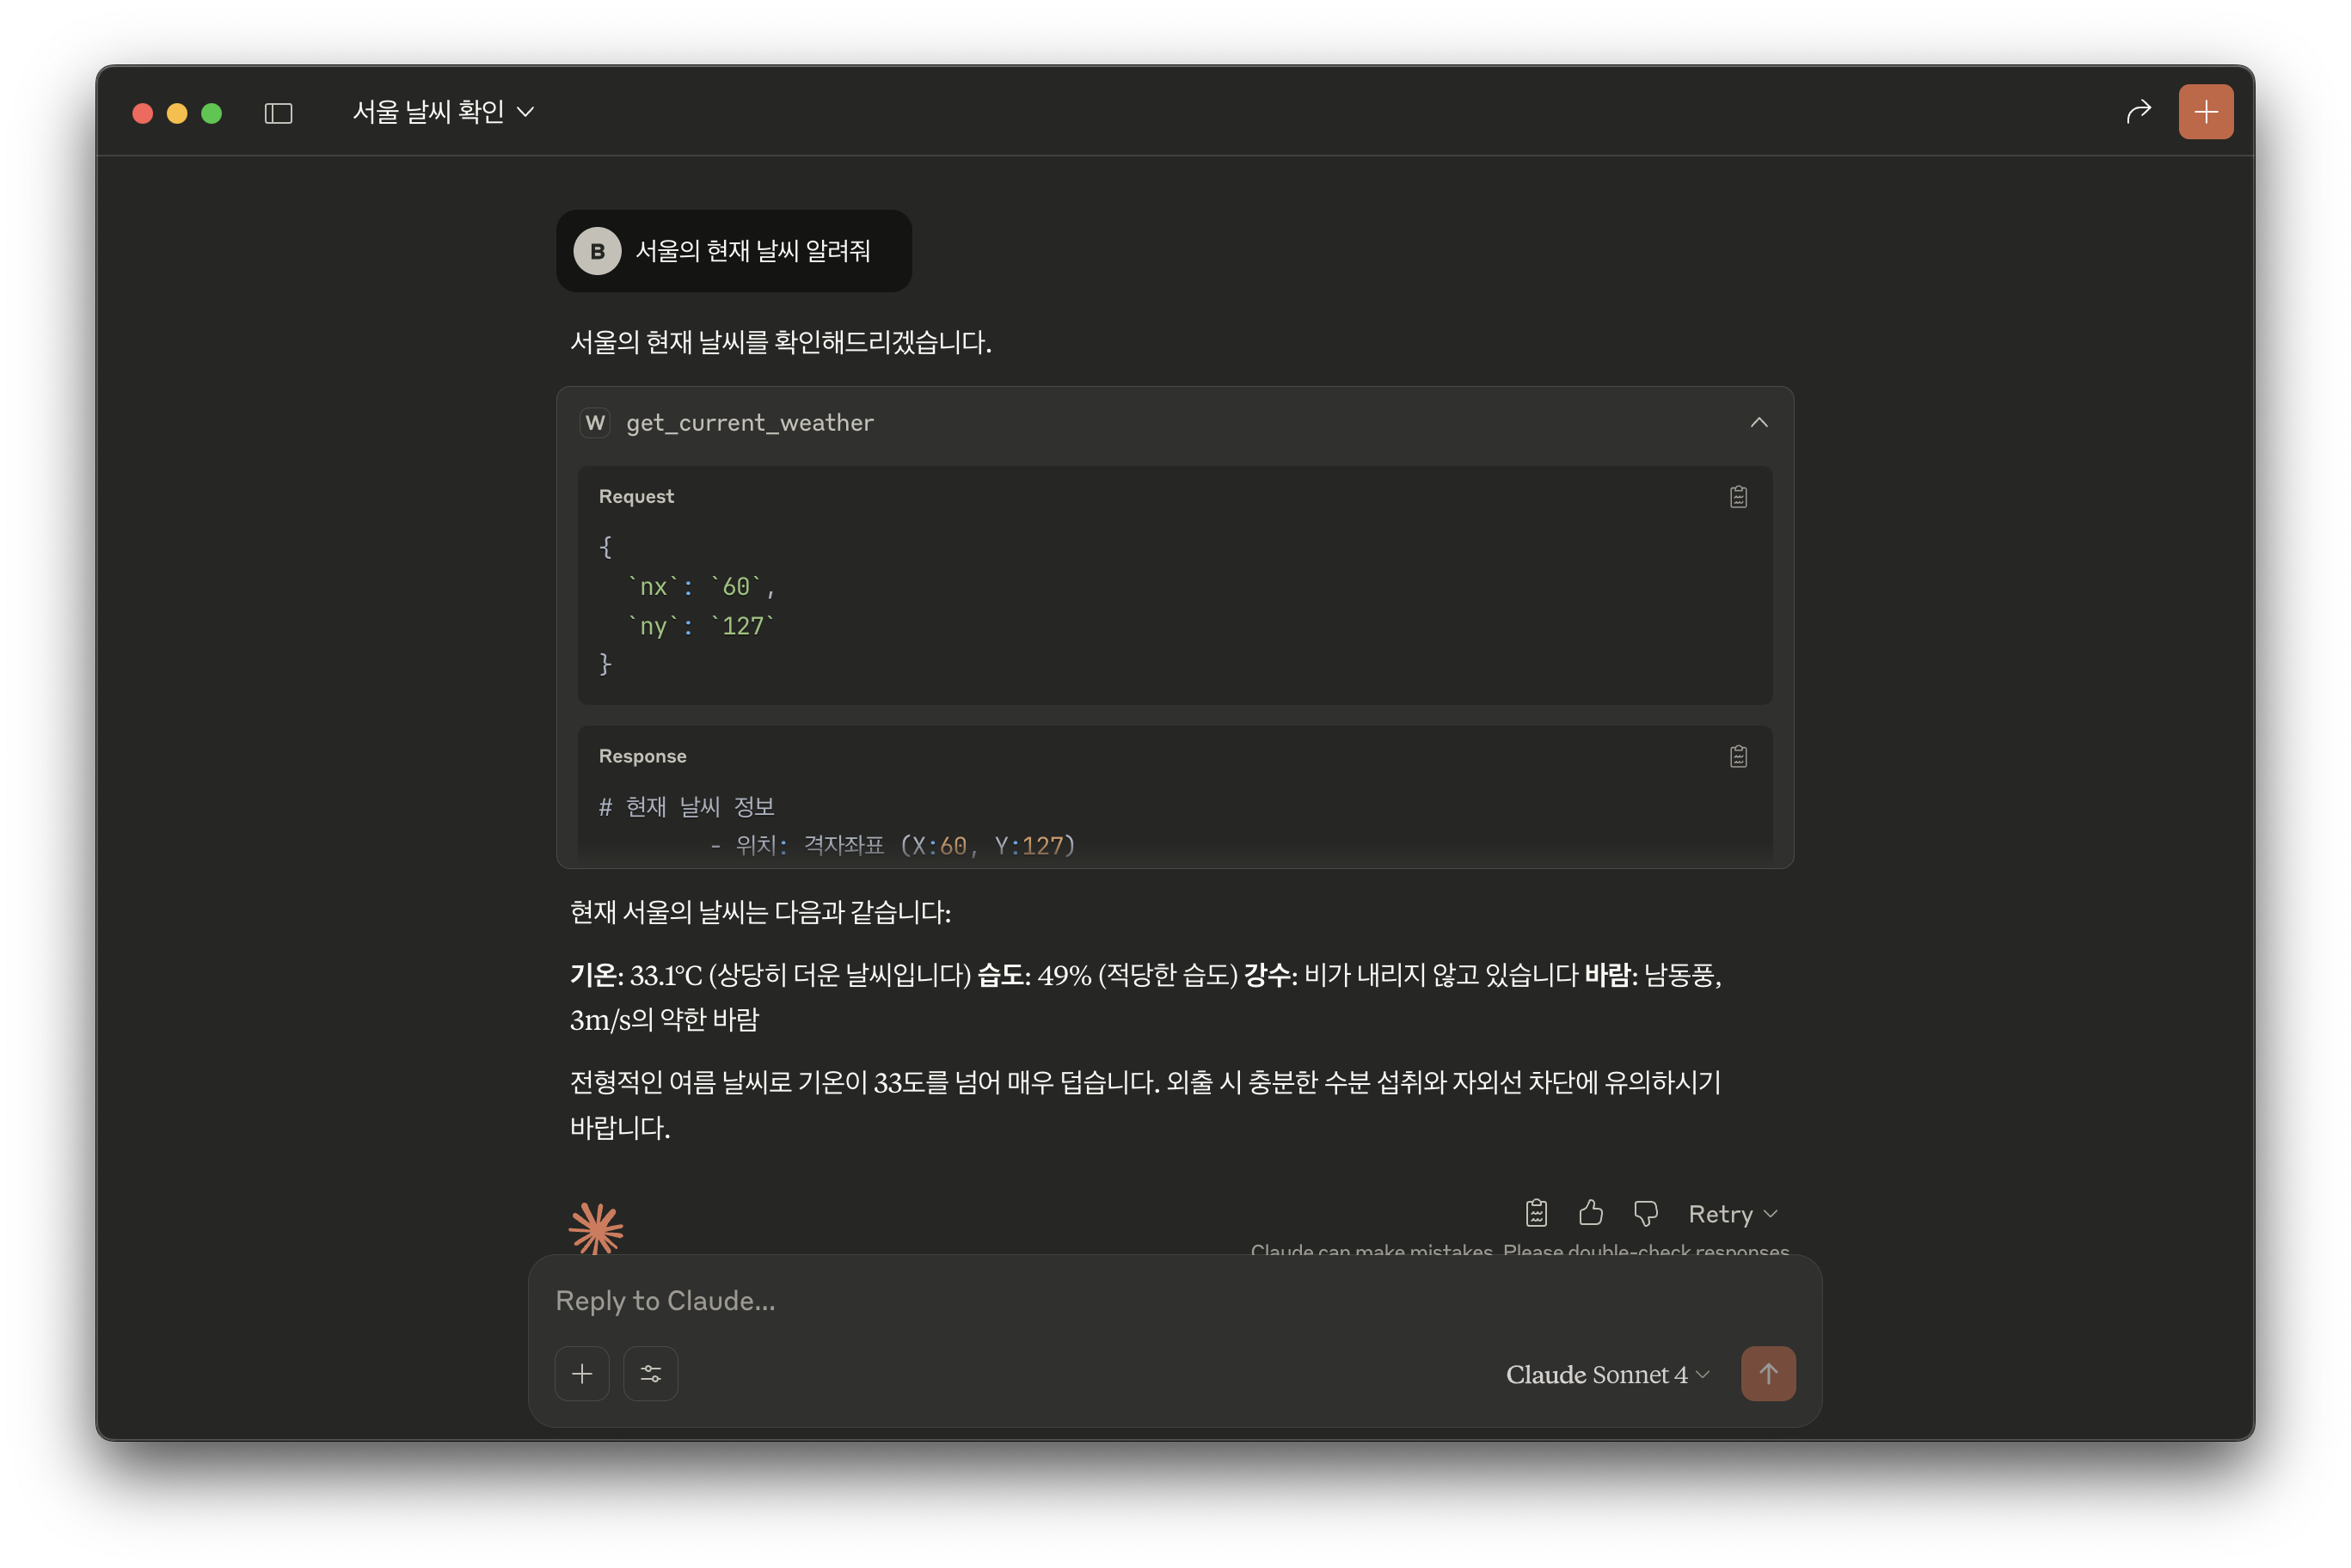
7. Claude Desktop에서 프롬프팅! - 서울의 현재 날씨를 알려줘
처음 weather.py 사용할때 아래와 같이 허용여부를 선택하도록 되어 있음

8. 공공데이터포털 날씨정보 오픈API를 통해 보다 정확한 실시간 데이터로 답변을 받을 수 있음
* 참고
"프롬프팅: 두 개의 값을 더할 거야. 10과 50을 MCP helloworld 서버의 도구를 써서 더해봐."
=> 위와 같이 'MCP helloworld 서버의 도구를 써서'와 같이 프롬프팅 할 수 있음